Microsotf Teams Integration Guide for NexusGPT
Integrate your agent into Microsoft Teams with Twilio by following these detailed steps.
To begin, you need to have a Microsoft Teams account and get your credentials. If you don't have a Microsoft Teams account, you can create one by going to this link. You also need to have an Azure account to create a bot. If you don't have an Azure account, you can create one by going to this link.
Once you have your Microsoft Teams and Azure accounts, you can proceed to the next step to configure the bot in the Azure console.
Configure Azure Account Credentials on NexusGPT
- Navigate to your Azure console dashboard.
- Create an app registration following the steps below.
-
Click on the
App registrationstab.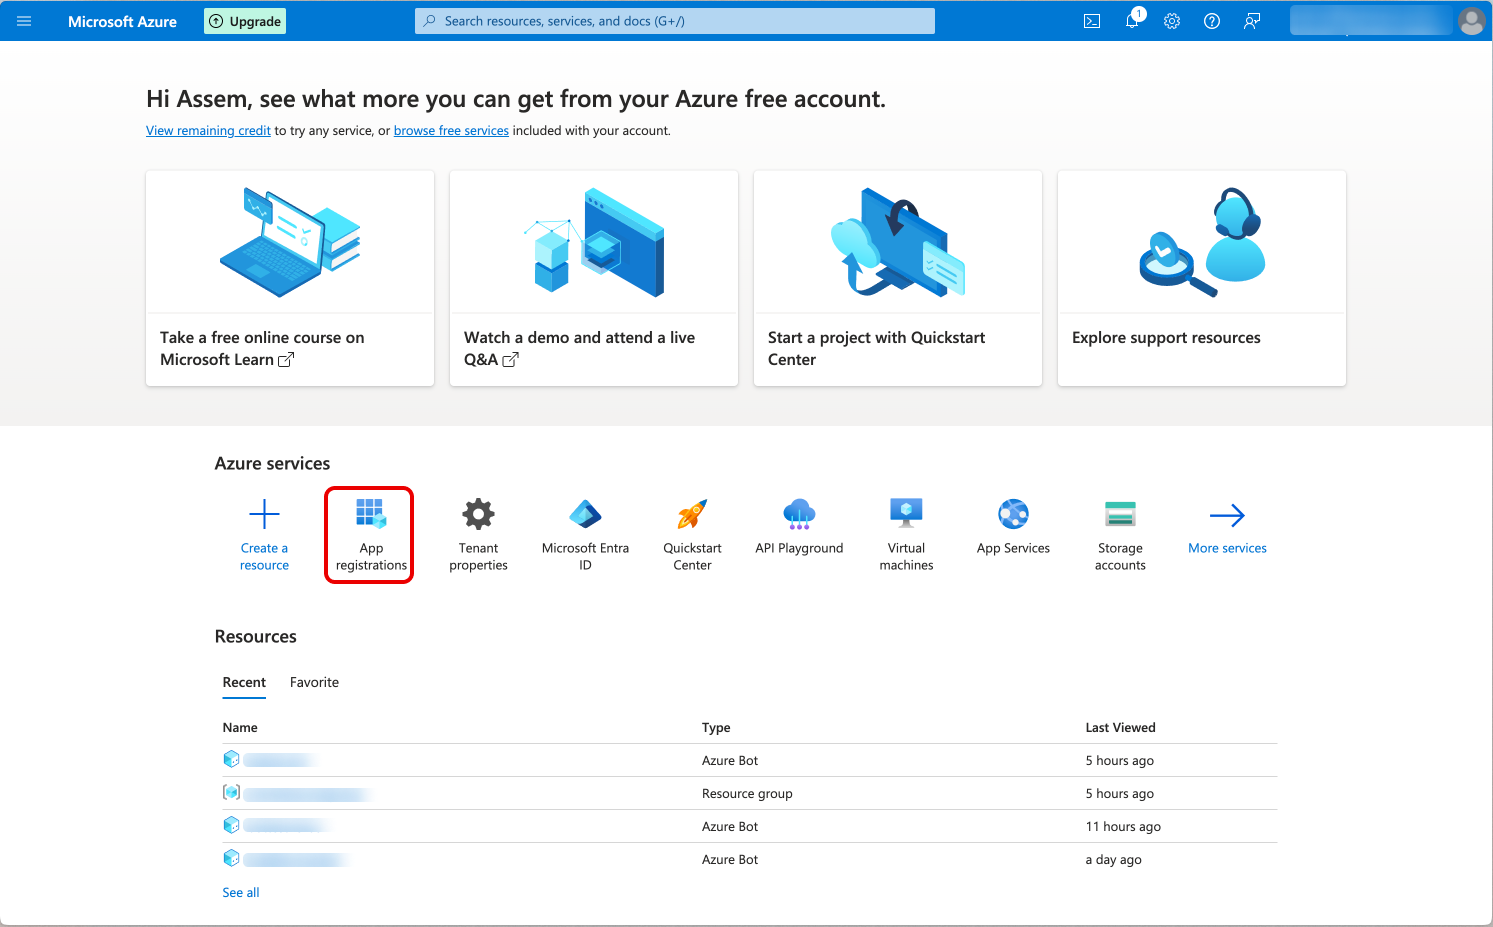
-
Click on the
New registrationbutton.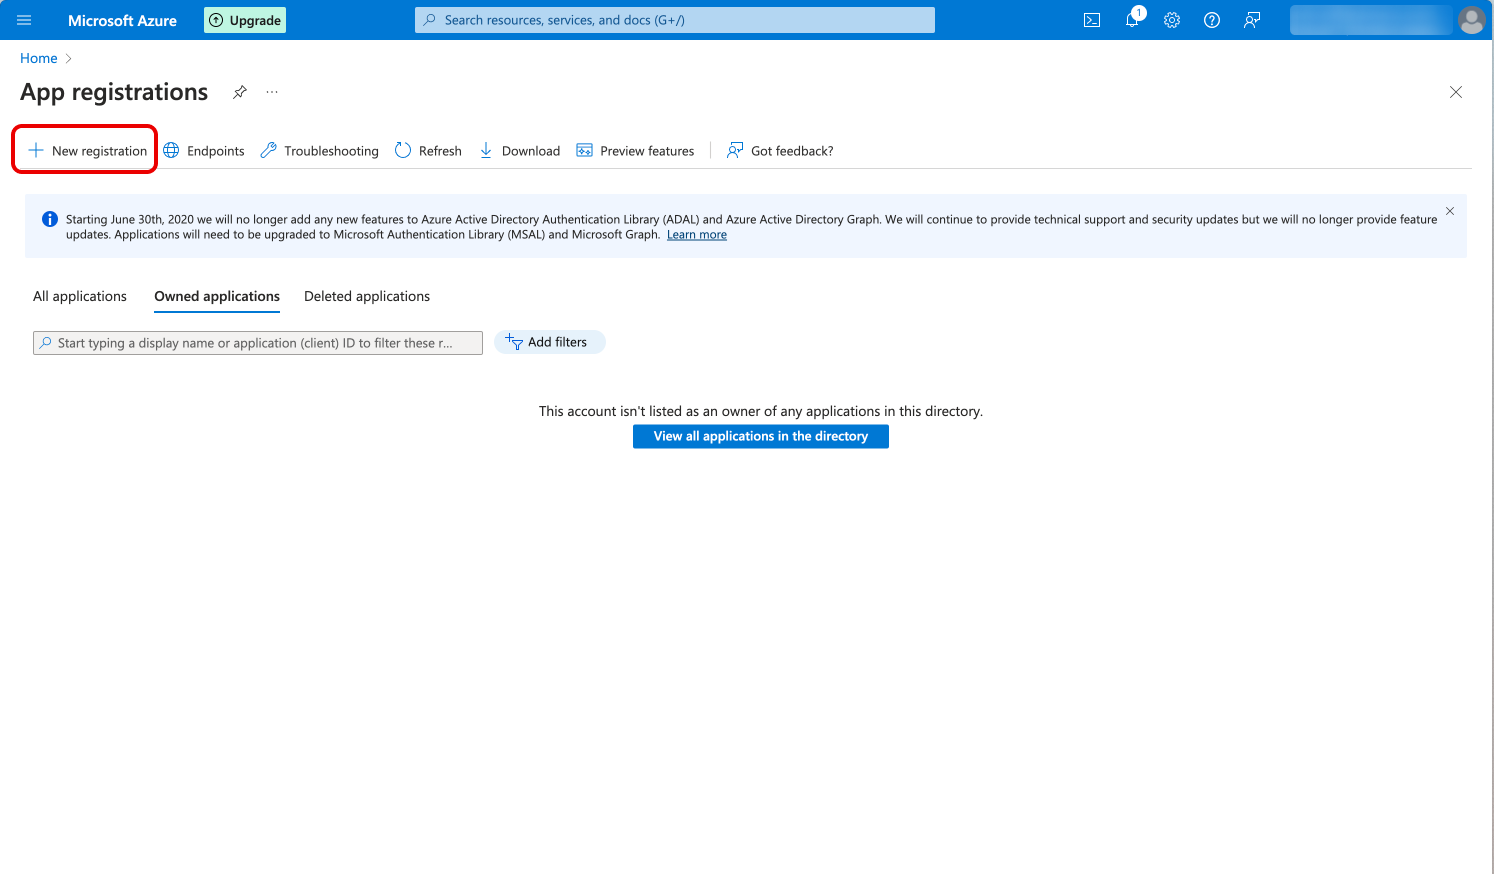
-
Fill in the
NameandSupported account typesfields. -
Click on the
Registerbutton.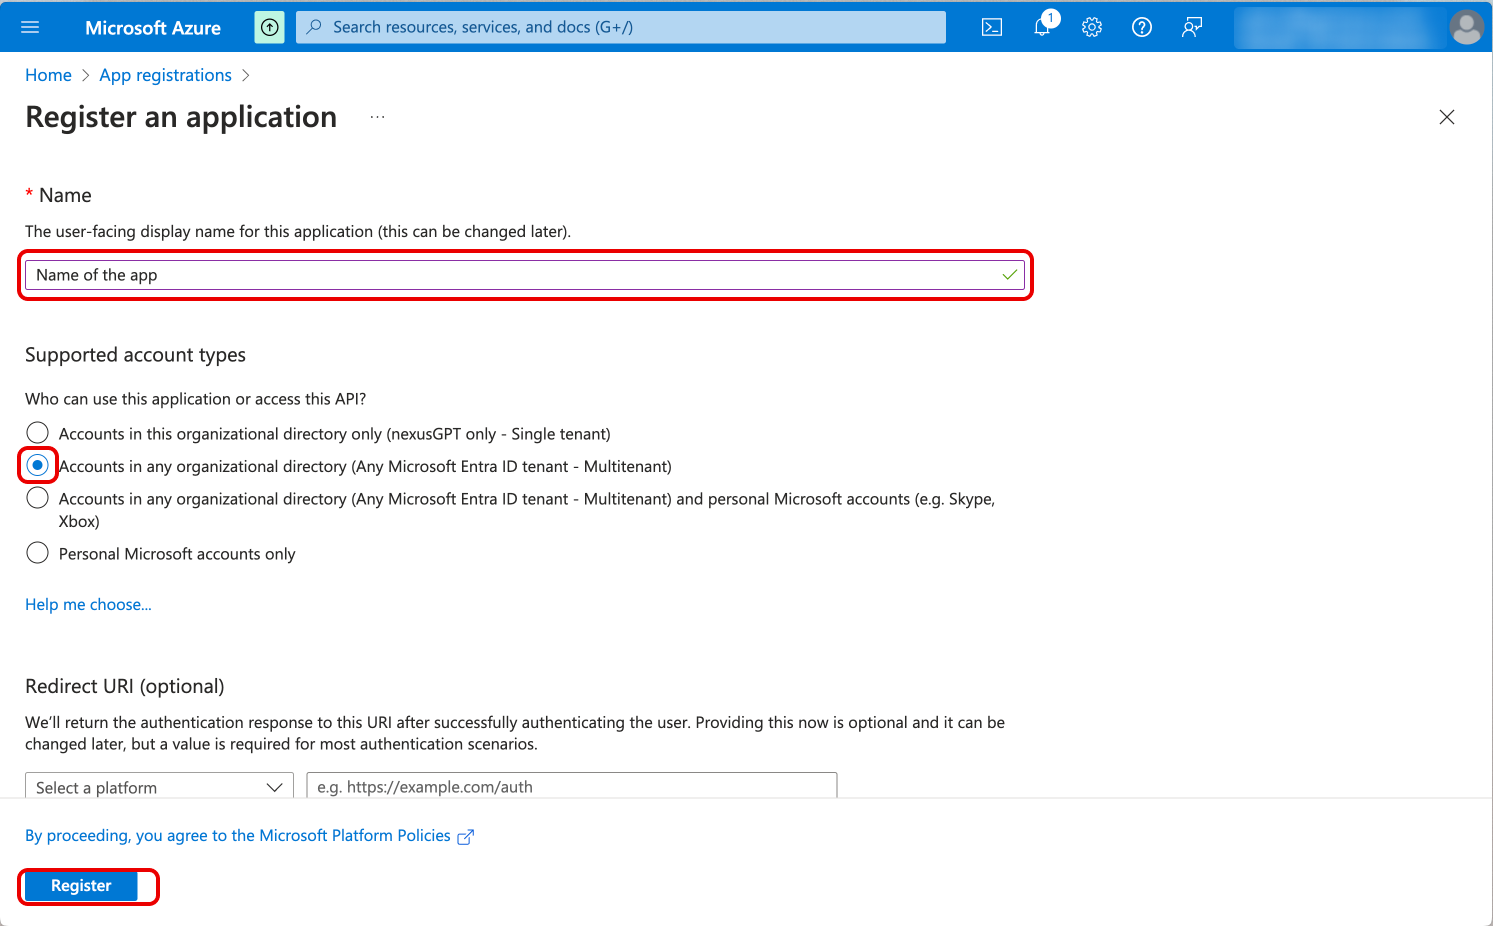
-
Copy the
Application (client) IDandDirectory (tenant) IDand save them for later use.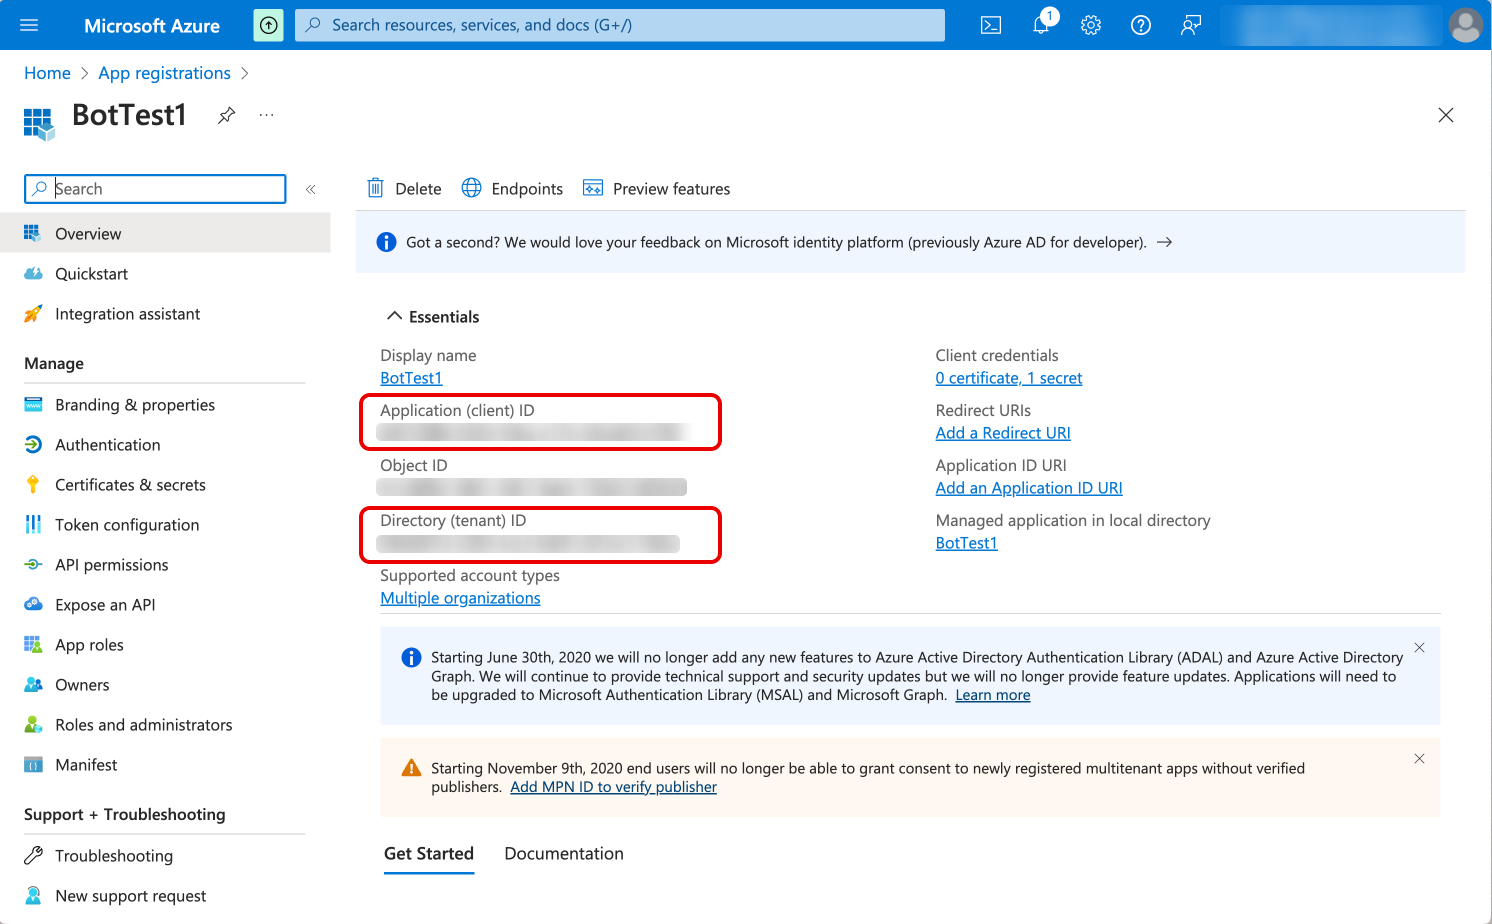
- Create a client secret following the steps below.
-
Click on the
Certificates & secretstab. -
Click on the
New client secretbutton.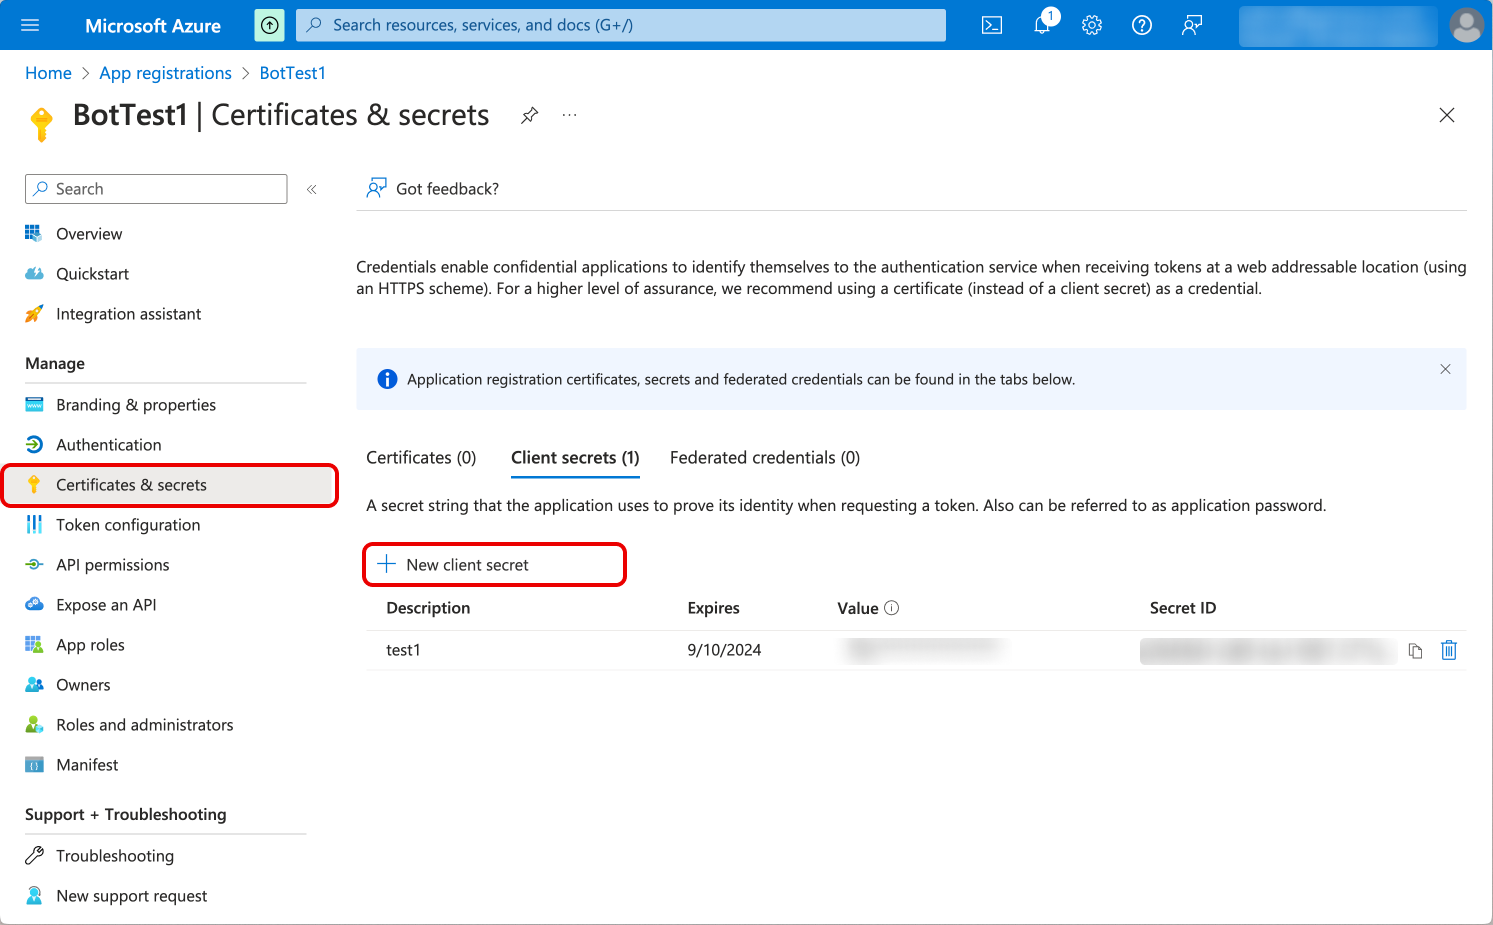
-
Fill in the
Descriptionfield. -
Click on the
Addbutton.
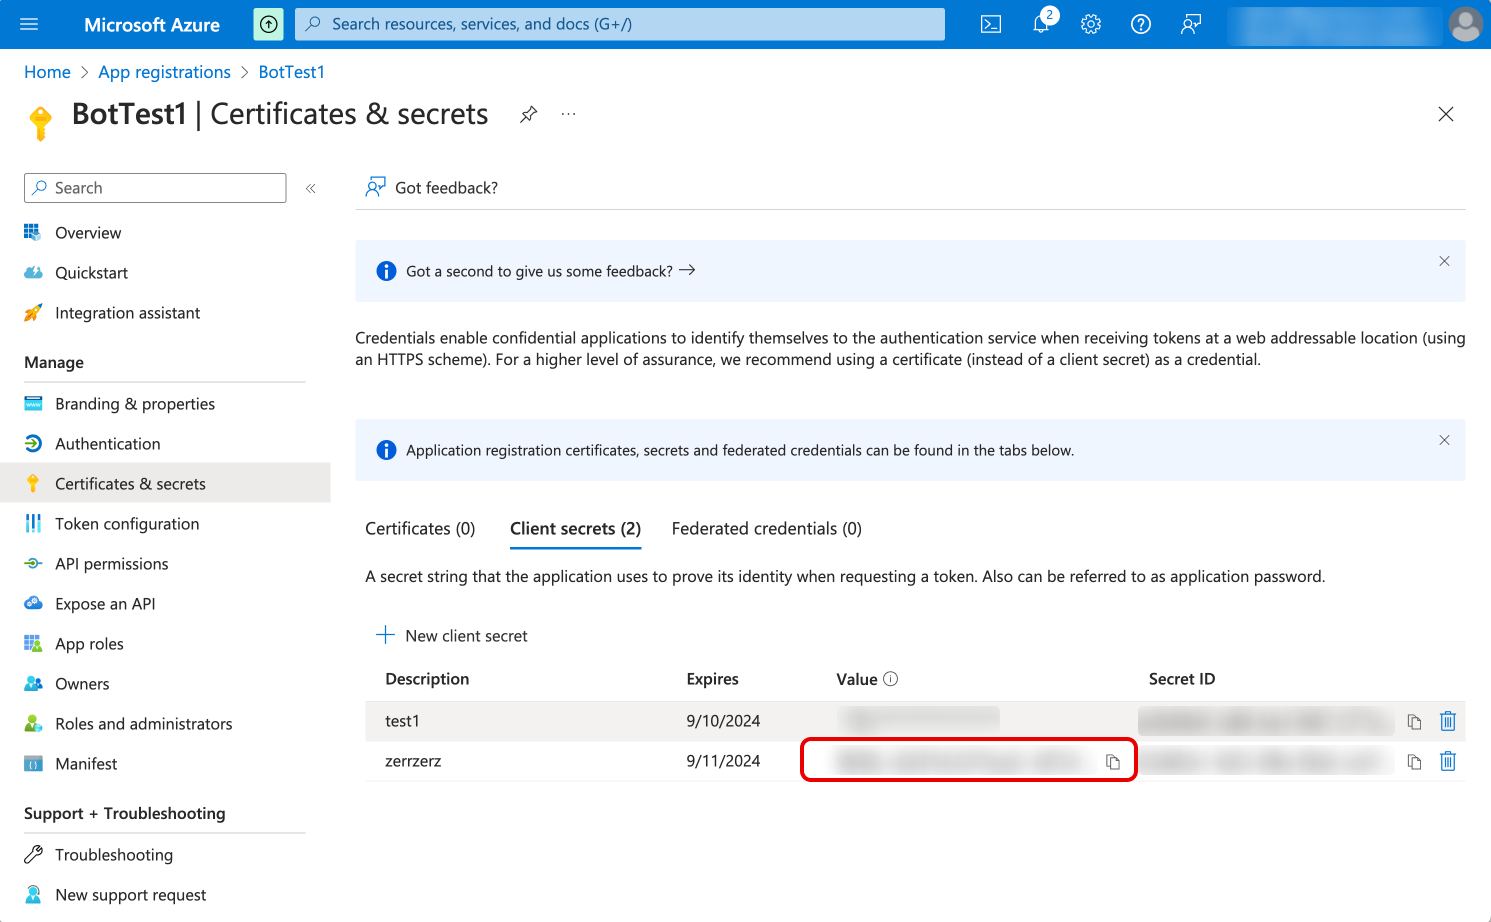
-
Copy the
Valueand save it for later use.
Create Microsoft Teams Integration on NexusGPT
Once you have setup the credentials, you go back to NexusGPT and configure the bot in the Microsoft Teams console. You will be prompted to give a name and a descritpion to your bot and to select the agent you want to use.
You will also need to provide the Application (client) ID, Directory (tenant) ID and Client secret you created before.
Once you have filled in the fields, click on the Create button.
The platform will create the bot and provide you with a webhook URL that you will need to configure in the Azure console, and a zip file containing the bot manifest that you will need to upload in the Microsoft Teams console.
Configure the azure bot
You will need to create a bot in the Azure console and configure it to work with Microsoft Teams.
- Navigate to your Azure console dashboard.
- Create a bot following the steps below.
-
Click on the
Create a resourcebutton.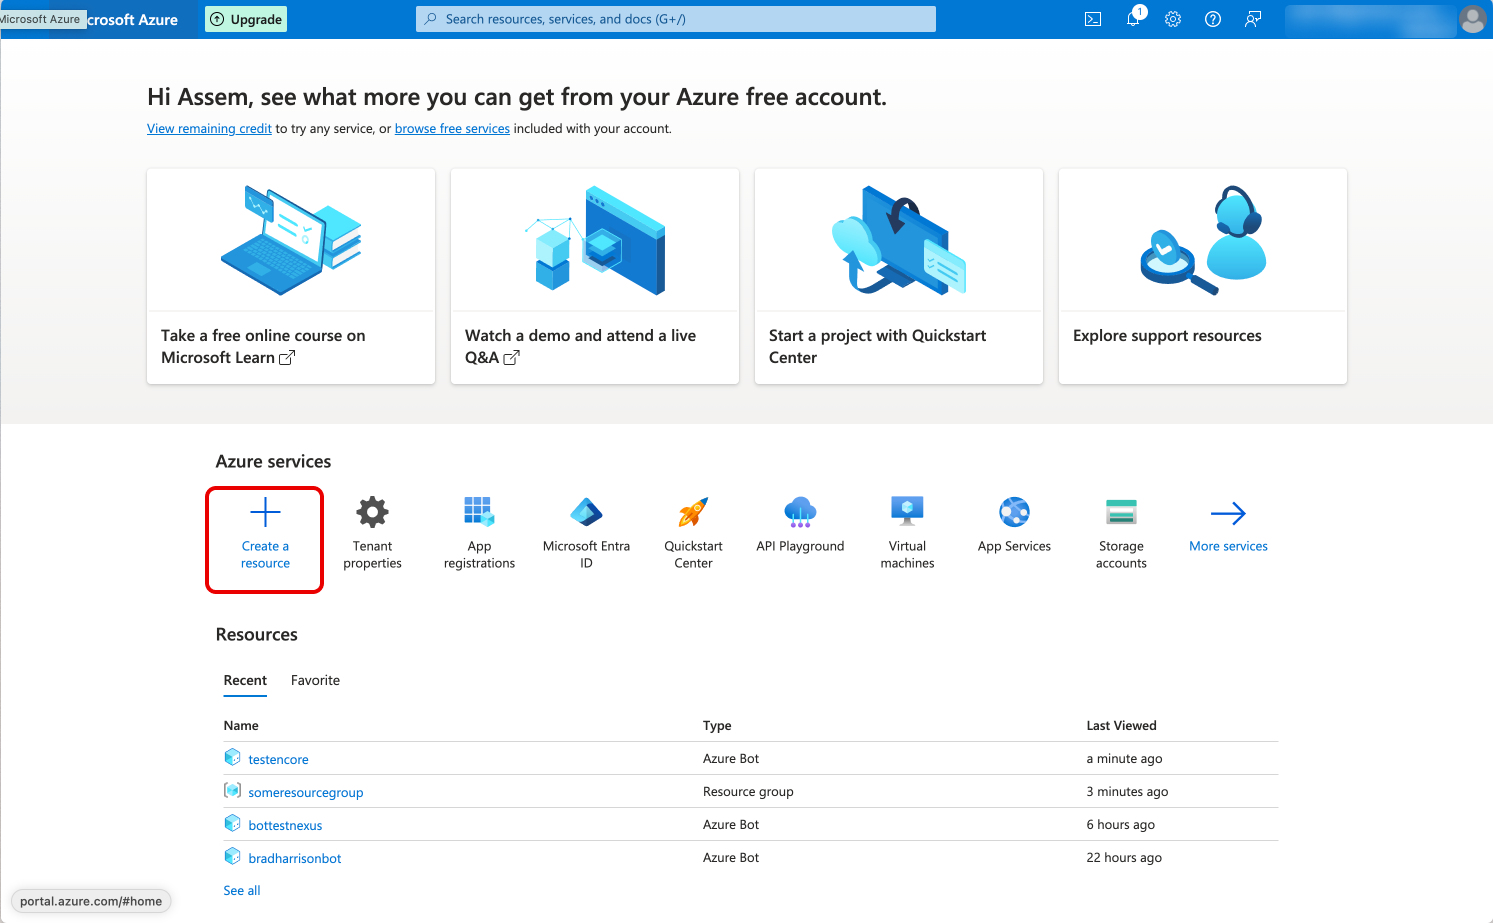
-
Search for
Azure Botand click on theCreatebutton.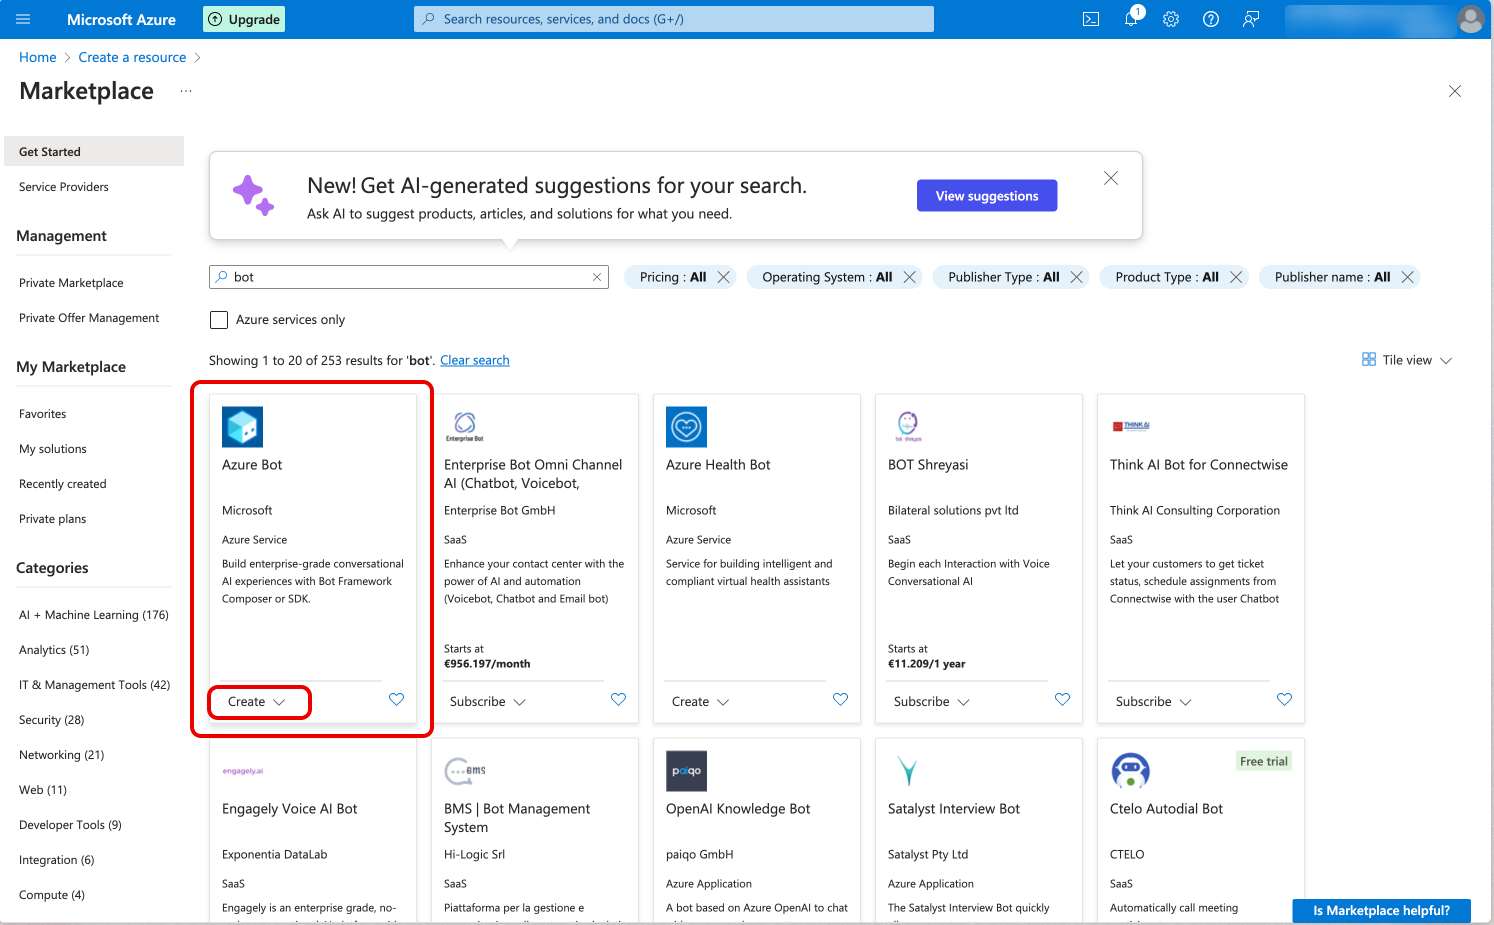
-
Fill in the
Bot nameandSubscriptionfields.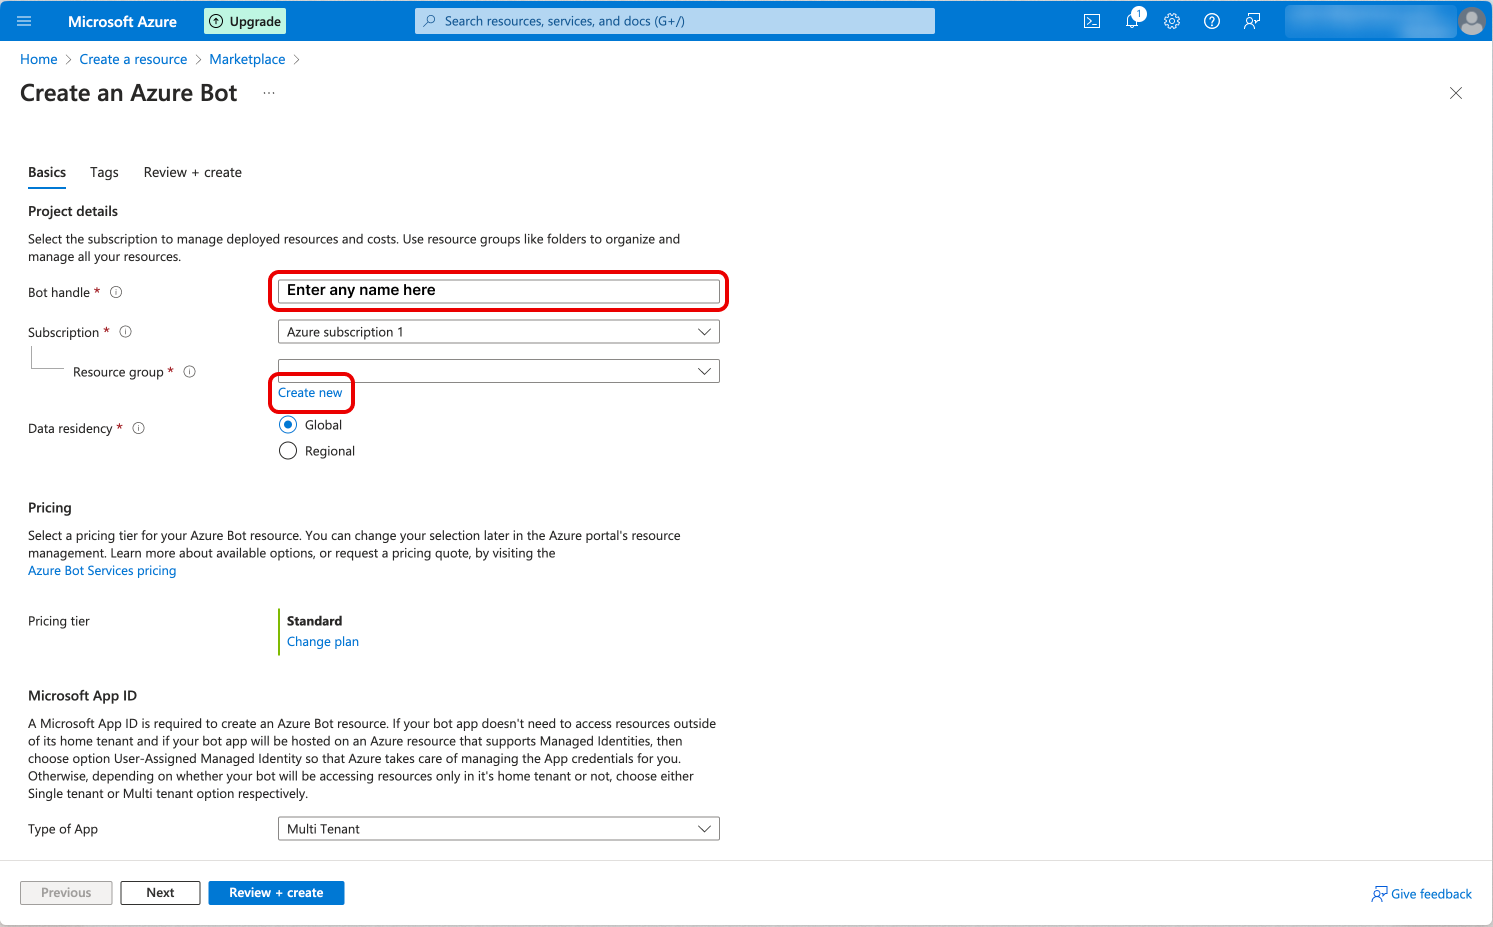
-
Add the
Resource group(create a new one if you don't have one).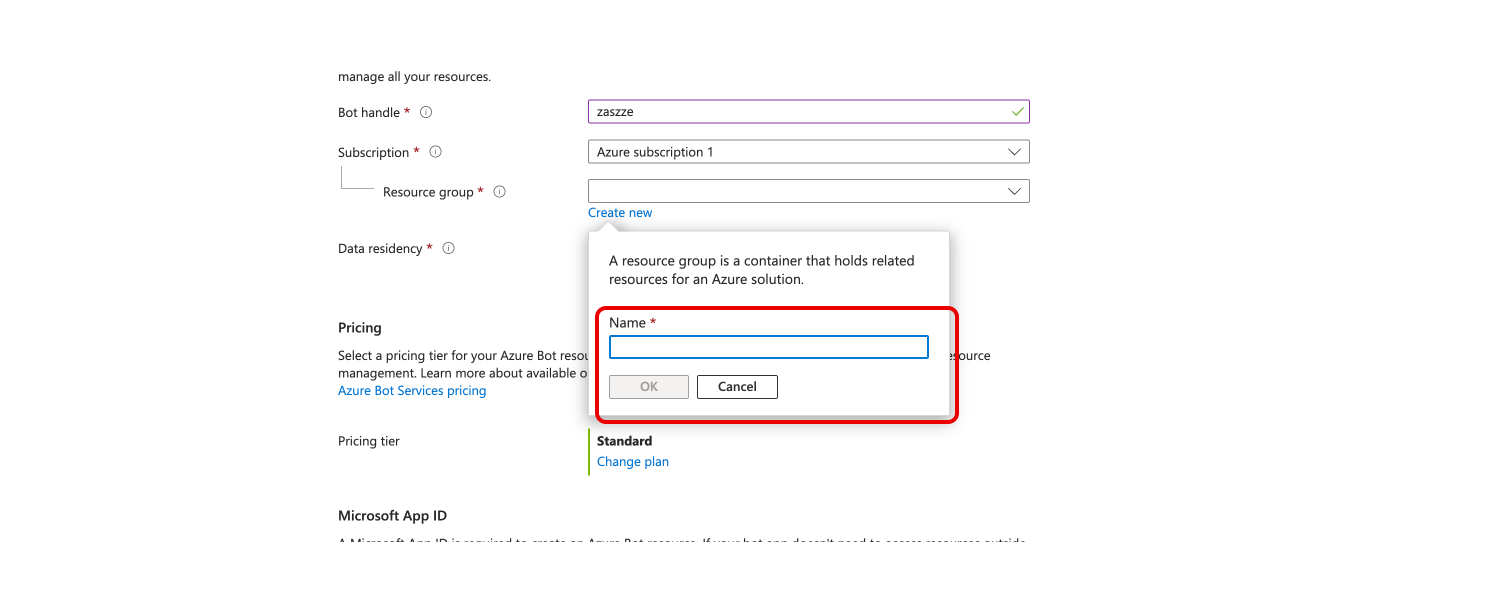
-
Select the
Creation typetoUse existing app registrationand select the app registration you created before (Application ID). -
Click on the
Review + createbutton.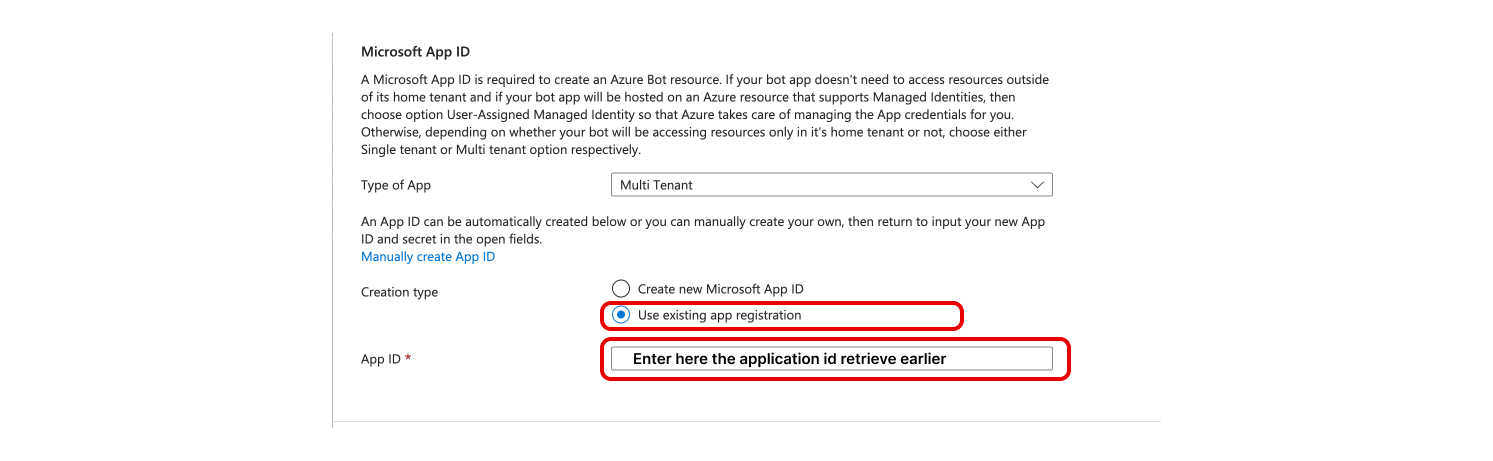
- Configure the bot following the steps below.
-
Go to the
Channelstab and click on theMicrosoft Teamsbutton.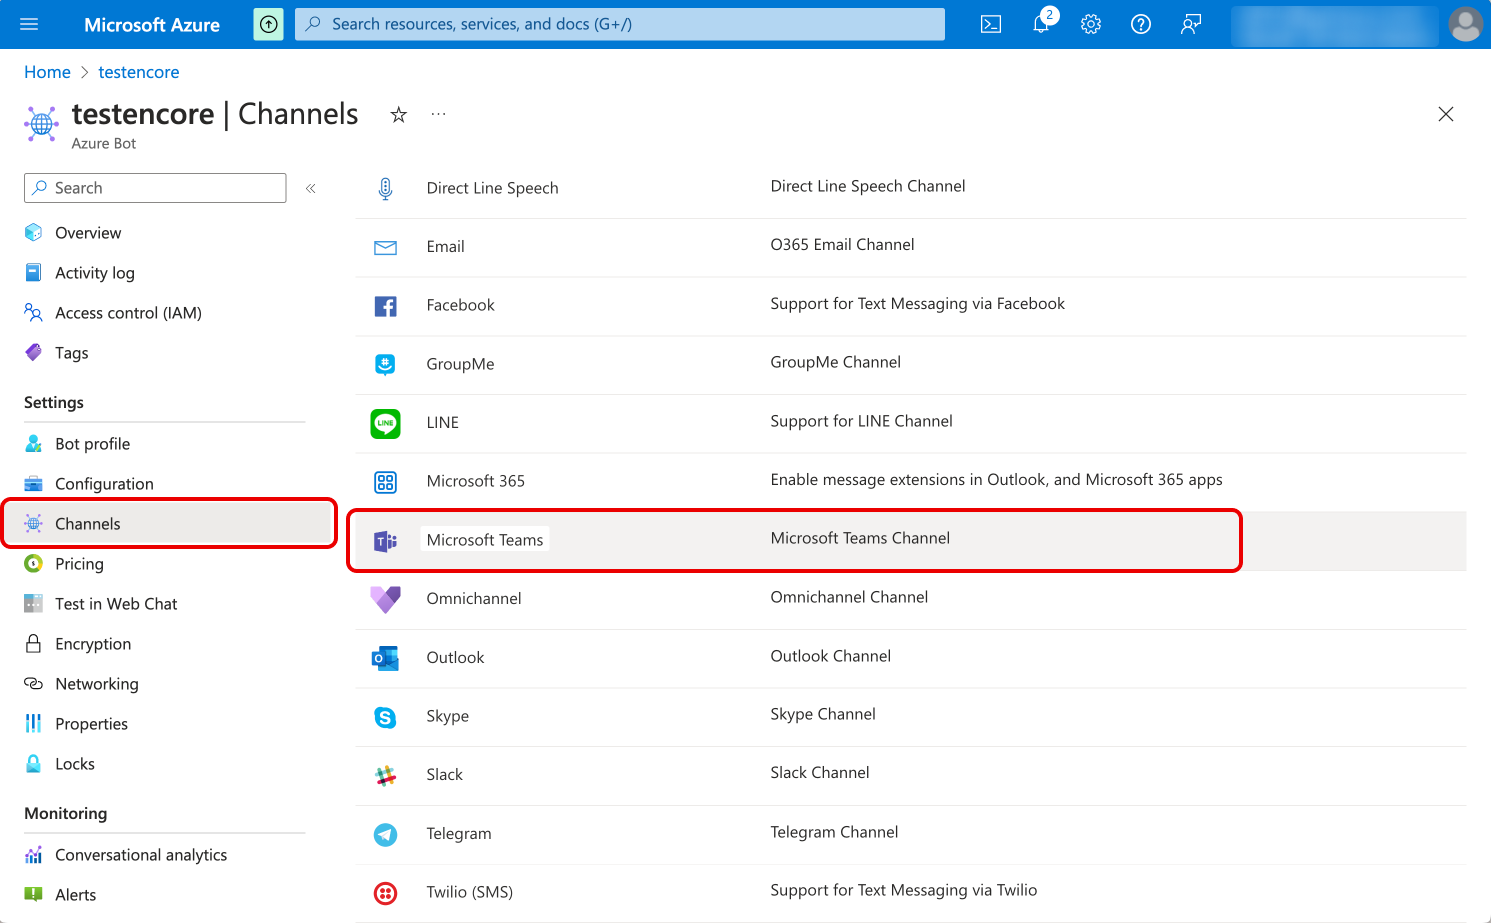
-
Accept the terms and click on the
Savebutton. Select theMicrosoft Teamschannel and click on theSavebutton.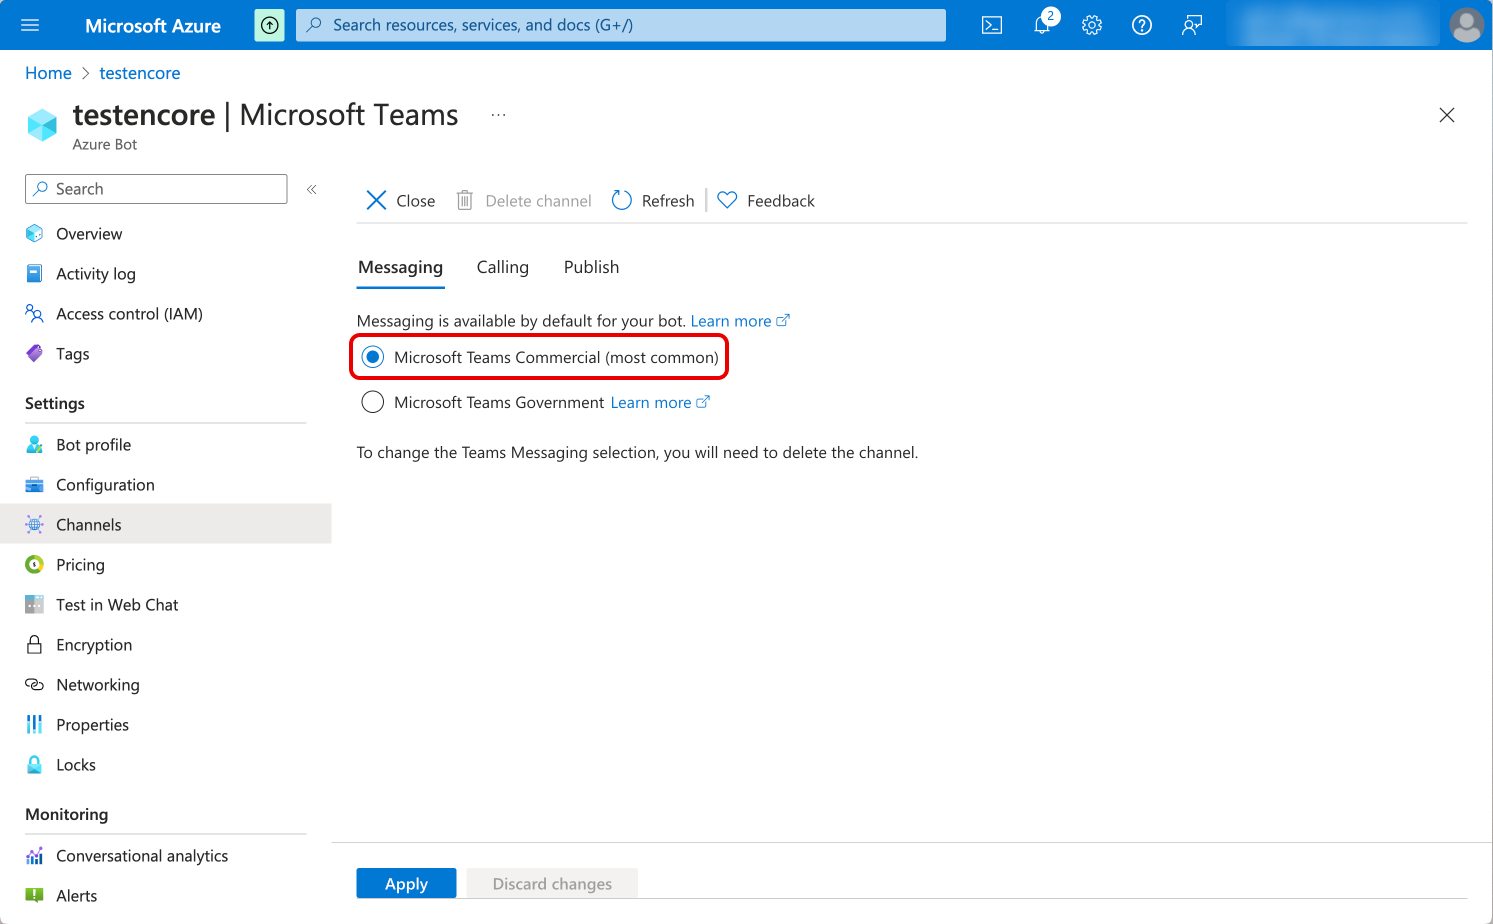
-
Go to the
Configurationtab and past the webhook URL provided by NexusGPT in theBot endpointfield and click on theApplybutton.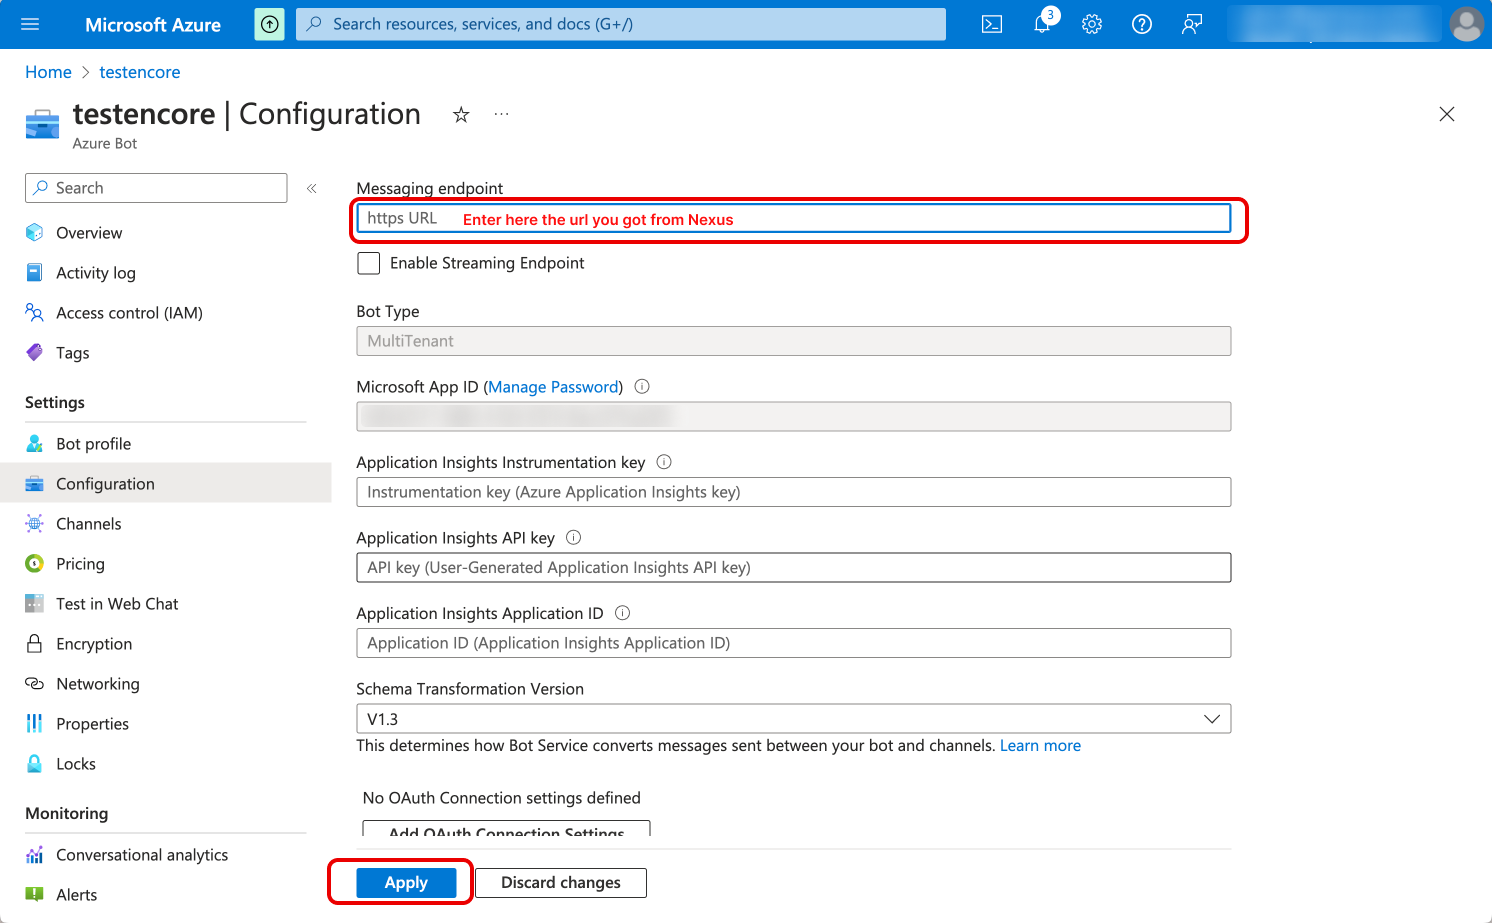
Add your bot to a microsoft teams
- Go to the
Microsoft Teamsapp and click on theAppstab.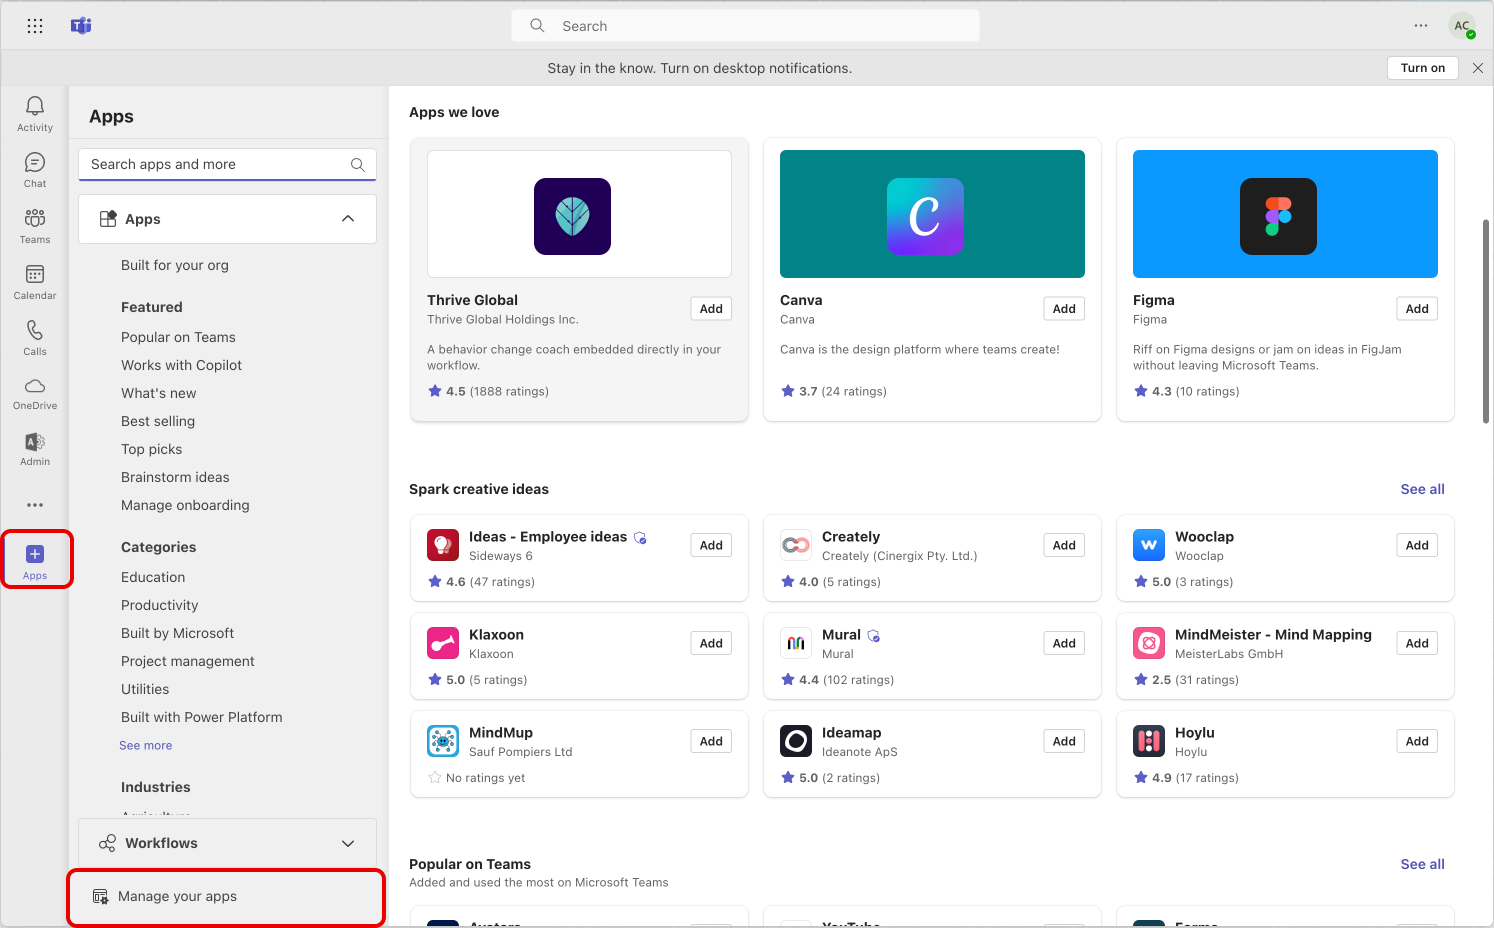
- Click on the
Upload an appbutton.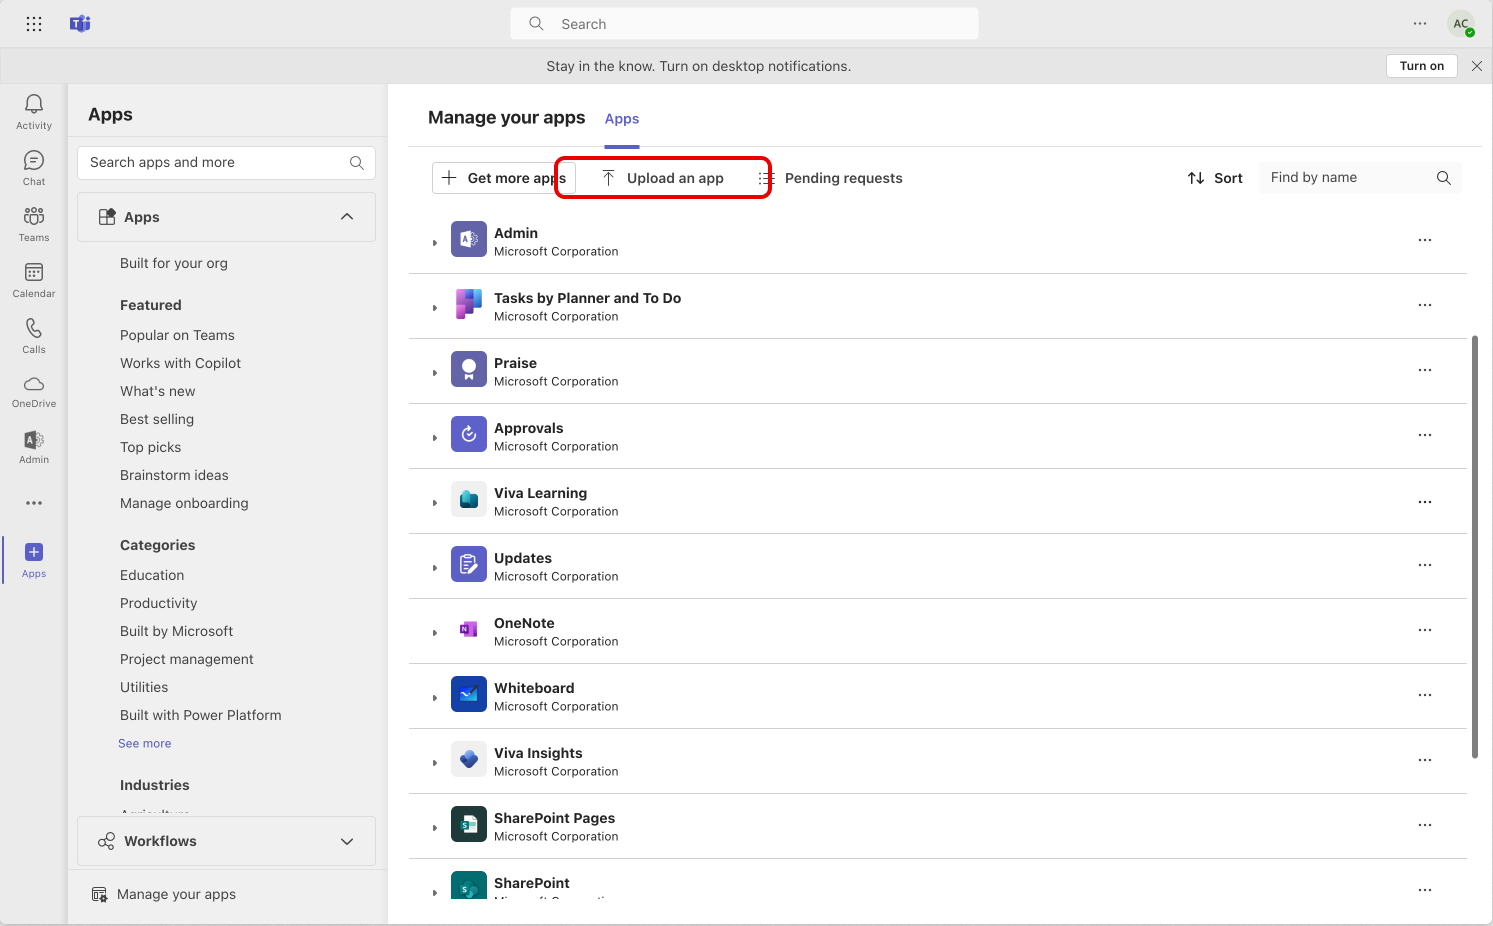
- Select the
Upload an appbutton and select the package you zip file provided by Nexus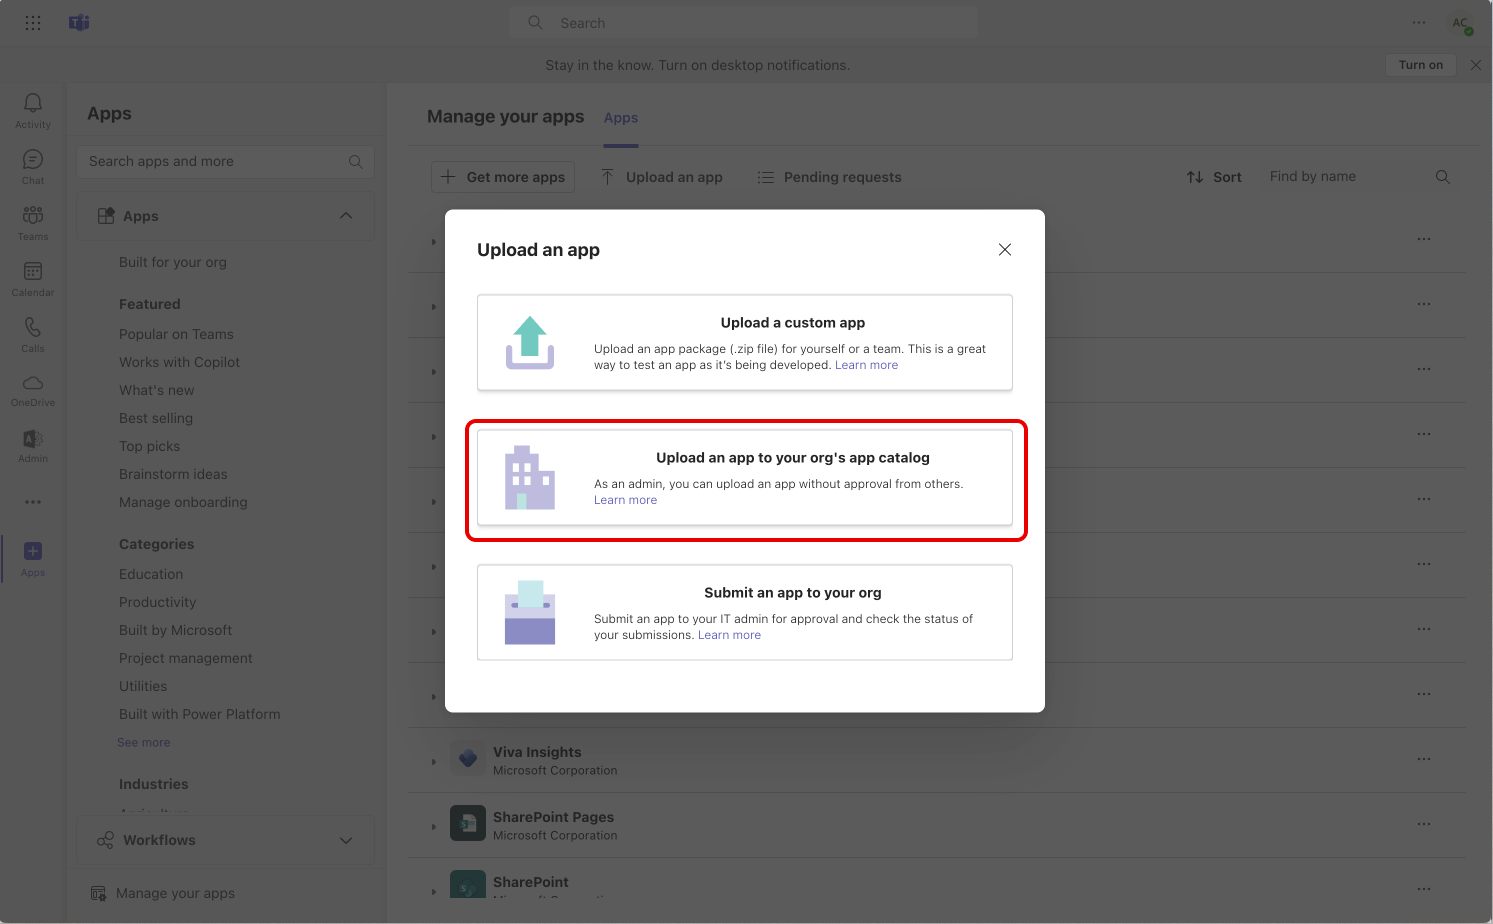
Test your bot
- Go to the
Microsoft Teamsapp and click on theChattab. - Click on the
New chatbutton and select your bot. - Start a conversation with your bot and test it.
Conclusion
You have successfully integrated your agent into Microsoft Teams with Twilio. You can now use your bot to interact with your users in Microsoft Teams. If you have any questions or need further assistance, please contact us on discord or by email at contact@gpt.nexus.